|
a
|
Connect your workstation or laptop to the Ethernet port labeled mgmt1. Ensure that your workstation or laptop’s network adapter is set for DHCP. Wait for DHCP to time out and for your workstation or laptop to assign itself an IP address in the 169.254.x.x subnet.
|
|
b
|
Open a browser and enter the IP address, 169.254.0.1. The login page appears.
|
|
a
|
Install the virtual machine according to the appropriate Silver Peak Quick Start Guide for your hypervisor and deployment mode.
|
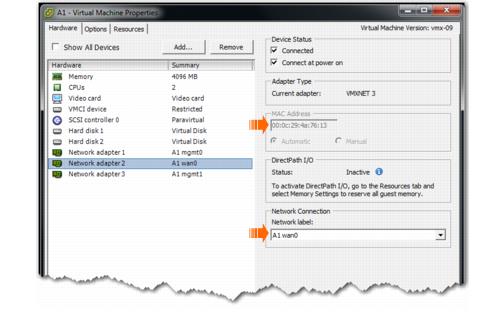
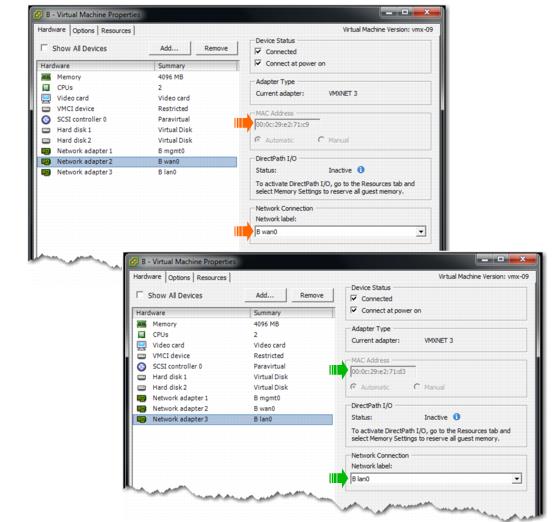
For Bridge (In-Line) or Router (Out-of-Path) mode, follow the directions to add the required virtual interfaces (vNICs). Record the IP and MAC addresses for reference.
|
b
|
Open a browser and enter the mgmt0 IP address. The login page appears.
|
|
2
|
For the username and for the password, enter admin. The initial configuration page appears.
Read it, and click Next. |
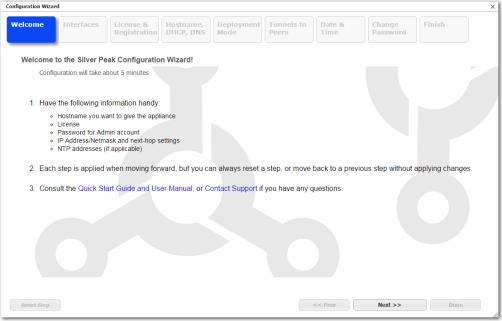 |
Note  At any future time, you can always access the Initial Config Wizard by going to the Configuration menu and selecting Initial Config Wizard from the drop-down menu.
|
3
|
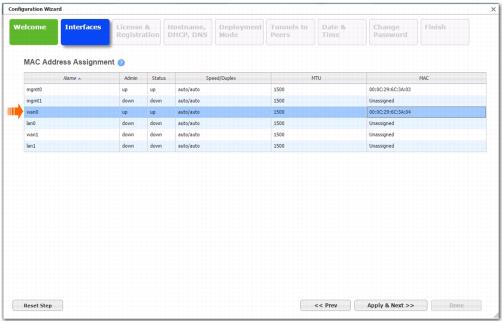
Select the MAC address for wan0. Make sure that the addresses match the MAC addresses associated with the virtual interfaces of the Silver Peak virtual machine (VM).
|
 |
 |
|
4
|
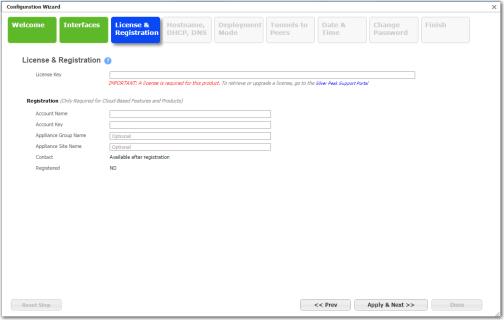
Click Apply & Next. The License & Registration page appears. Enter the license details.
|
 |
|
5
|
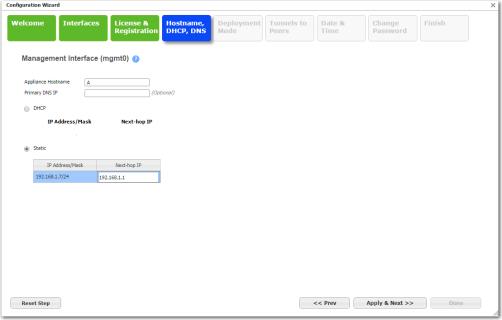
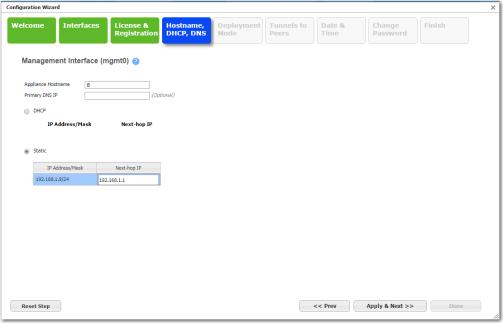
Click Apply & Next. The Management Interface (mgmt0) page appears. Enter the appliance name and management IP details.
|
 |
|
6
|
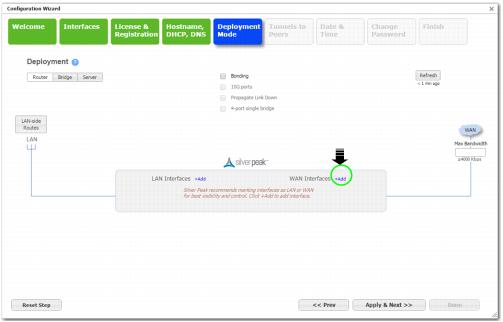
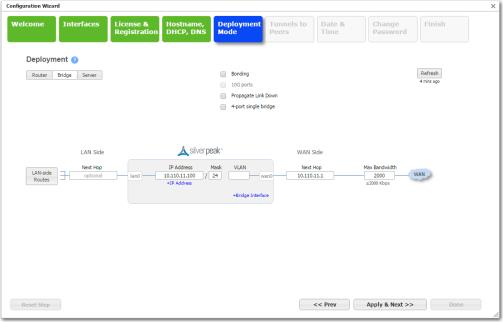
Click Apply & Next. The Deployment Mode page appears. Under Deployment, select Router and then click +Add to add a WAN interface.
|
 |
 |
|
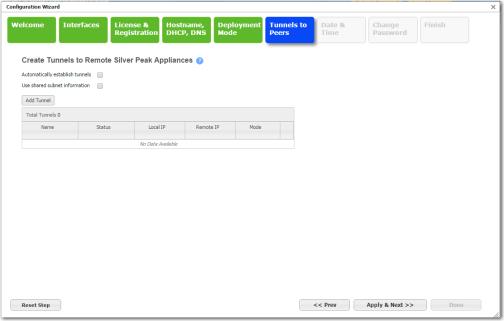
7
|
Click Apply & Next.
|
On this page, leave Auto Tunnel and Auto Subnet Sharing deselected. We’ll take care of these features later. Although it’s not technically necessary to deselect either one, we have chosen to do so for tutorial purposes later in this chapter.
 |
|
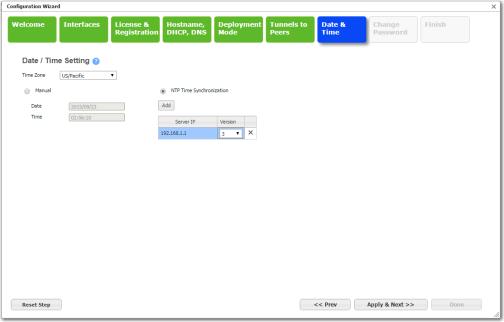
8
|
Click Apply & Next. The Date/Time Setting page appears. Configure the time zone and NTP server.
|
 |
|
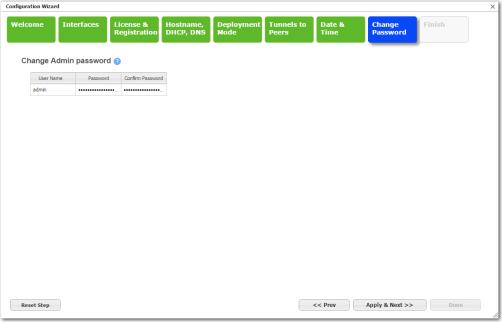
9
|
Click Apply & Next. The Change Admin Password page appears. If necessary, create a new username and password.
|
 |
|
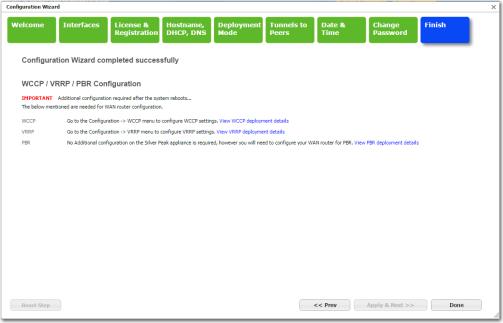
10
|
Click Apply & Next. The last wizard page appears.
|
 |
|
11
|
Click Done. The appliance saves the settings and reboots automatically.
|
|
12
|
For the username and for the password, enter admin. The initial configuration page appears.
|
 |
Note  At any future time, you can always access the Initial Config Wizard by going to the Configuration menu and selecting Initial Config Wizard from the drop-down menu.
|
13
|
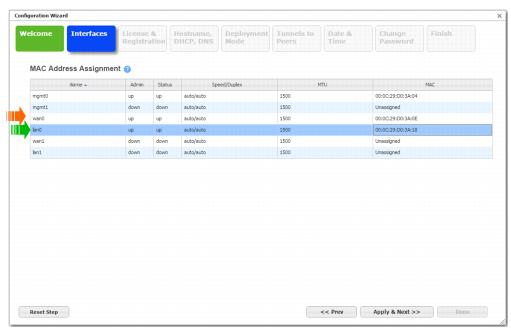
Read it, and click Next. Select the MAC addresses for lan0 and wan0. Make sure that the addresses match the MAC addresses associated with the virtual interfaces of the Silver Peak virtual machine.
|
 |
 |
|
14
|
Click Apply & Next. The License & Registration page appears. Enter the license details.
|
 |
|
15
|
Click Apply & Next. The Management Interface (mgmt0) page appears. Enter the appliance name and management IP details.
|
 |
|
16
|
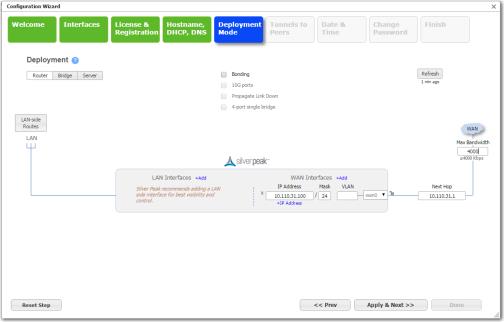
Click Apply & Next. The Deployment Mode page appears. Under Deployment, select Bridge and configure the appliance data path IP next-hop router address and max WAN bandwidth.
|
 |
|
17
|
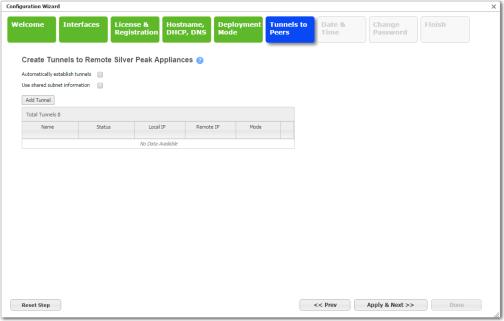
Click Apply & Next. The Tunnels to Peers page appears.
|
 |
|
a
|
Leave Auto Tunnel and Auto Subnet Sharing deselected. We’ll take care of these features later. Although it’s not technically necessary to deselect either one, we have chosen to do so for tutorial purposes later in this chapter.
|
|
b
|
Do not add tunnels. We’ll manually add remote appliances and create tunnels later.
|
|
18
|
Click Apply & Next. The Date/Time Setting page appears. Configure the time zone and NTP server.
|
 |
|
19
|
Click Apply & Next. The Change Admin Password page appears. If necessary, create a new username and password.
|
 |
|
20
|
Click Apply & Next. The last wizard page appears.
|
 |
|
21
|
Click Done. The appliance saves the settings and reboots automatically.
|