Note  Using auto subnet sharing is a recommended best practice. If you choose not to use subnet sharing, you must also configure inbound redirection on the WAN router (or L3 switch) to avoid creating asymmetric flows that cannot be accelerated. For those instructions, refer back to “Inbound Redirection”.
In the next few steps, we’ll enable subnet sharing on the appliances, but no subnet informations will actually be shared until the tunnels are brought up in the next section.
Note  You could have selected Auto Subnet Sharing in the Initial Config Wizard, instead of doing this step. We do it here to highlight how the Subnet table changes after tunnels come up.
|
1
|
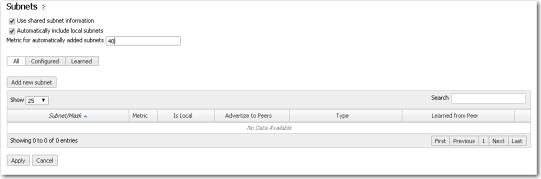
On Appliance A, select Configuration > Subnets. The Subnets tab appears. Notice that no subnets are displayed.
|
 |
|
a
|
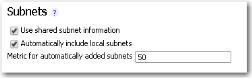
Select Use shared subnet information.
|
|
b
|
Select Automatically include local subnets.
|
|
c
|
|
2
|
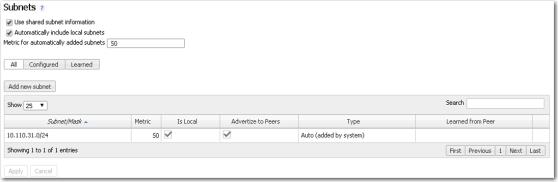
Click Apply.
|
The subnet table updates to include the local subnet.
If it doesn’t, try refreshing the page.
If it doesn’t, try refreshing the page.
 |
|
1
|
 |
|
a
|
Select Use shared subnet information.
|
|
b
|
Select Automatically include local subnets.
|
|
c
|
|
2
|
Click Apply.
|