You’ll want to make one appliance the Master, and make the other Site A appliance (on the same subnet) the Backup.
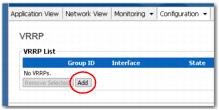
On the Configuration - VRRP page, you’ll start to set this up by using Virtual Router Redundancy Protocol (VRRP) to assign the primary appliance a higher priority than you assign the secondary appliance.
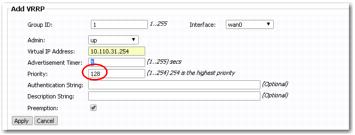
Since this is the primary appliance, set the priority to 130. This will be higher than the secondary (backup) appliance, which remains set to the default of 128.
|
n
|
|
n
|
Because we want our network to behave deterministically — to minimize the amount of flow redirection that is needed — we will configure A1 with a priority of 130, and A2 with a priority of 128. With A1 having the higher priority, it becomes the Master when both appliances are up.
|
|
n
|
Check the Preemption checkbox.
|
|
•
|
|
•
|
A2, if it was acting as Master, reverts to backup when A1 assumes the role of Master.
|
|
•
|
If preemption is not enabled, then whichever appliance is Master remains Master, even if a device in that VRRP group has a higher priority. We always want A1 (which has a higher priority) to be the Master, so we enable preemption.
. |
|
1
|
 |
The Add VRRP area appears. Some fields display default values.
 |
|
a
|
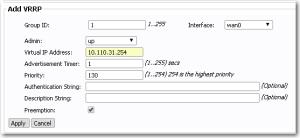
Assign a Group ID number. You’ll use the same number for the primary and backup devices. Here, we’re using 1.
|
|
b
|
|
c
|
|
d
|
|
e
|
In the Virtual Address field, enter the virtual IP that you’ll be using for both the primary and backup appliances. In our case, it’s 10.110.31.254.
|
|
f
|
Priority and Preemption work together. If two devices come up at the same time, the device with the highest priority becomes the Master, and lower priority devices are backups.
|
If Preemption is enabled and a device with a higher priority comes online in the VRRP group, it becomes the Master even if another device is already acting as Master. The lower priority device then reverts to being a Backup.
|
g
|
|
h
|
If you choose to use VRRP’s text authentication, then the Authentication String must be specified in all members of the group. In this deployment, that would include both of Site A’s appliances. Here, we’ll leave it blank.
|
|
2
|
Click Apply.
|
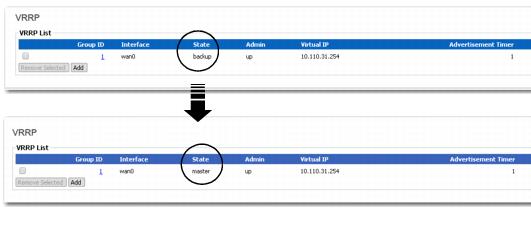
The summary should appear. Initially, the appliance shows up as a backup, but if it’s the first appliance in the group to come online, it assumes the role of Master.
 |
|
3
|
To store your configuration, make sure to click Save Changes.
|
This configuration is identical to A1’s, except the Priority on A2 is set to 128 (a lower priority) so that whenever A1 is up, A2 becomes the backup.
 |
 |