In the next few steps, we’ll enable subnet sharing on the appliances, but no subnet informations will actually be shared until the tunnels are brought up in the next section.
Note  You could have selected Auto Subnet Sharing in the Initial Config Wizard, instead of doing this step. We do it here to highlight how the Subnet table changes after tunnels come up.
|
1
|
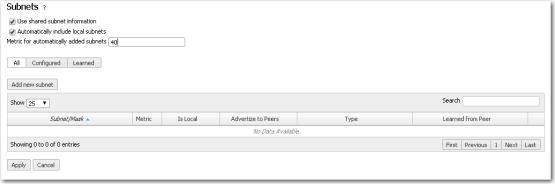
On Appliance A1, select Configuration > Subnets. The Subnets tab appears. Notice that no subnets are displayed.
|
 |
|
a
|
Select Use shared subnet information.
|
|
b
|
Select Automatically include local subnets.
|
|
c
|
Change the Metric for automatically added subnets to 40.
Setting the metric to 40, which is lower than the default, causes A1’s advertised subnets to be preferred over A2’s (which are advertised with the default metric of 50). |
|
2
|
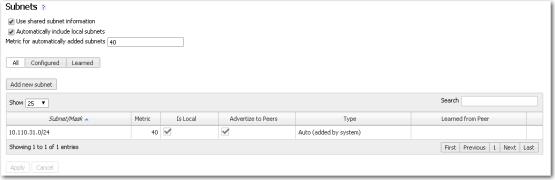
Click Apply. The subnet table updates to include the local subnet.
If it doesn’t, try refreshing the page. |
 |
|
w
|
|
1
|
 |
|
a
|
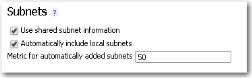
Select Use shared subnet information.
|
|
b
|
Select Automatically include local subnets.
|
|
c
|
A lower metric has a higher priority. Setting the metric to 50, which is higher than A1’s metric, causes A1’s advertised subnets to be preferred over A2’s (which are advertised with the default metric of 50).
|
2
|
Click Apply.
|
|
1
|
 |
|
a
|
Select Use shared subnet information.
|
|
b
|
Select Automatically include local subnets.
|
|
c
|
|
2
|
Click Apply.
|